It should be noted that this document is
intended for patients at The Royal Children’s Hospital (RCH) only and other providers should kindly discuss their memento making
with their relevant employer.
We would like to acknowledge the generosity of the RCH Foundation who have provided funding towards the supplies required to complete the mementoes cited in this guideline. It is thanks to their support that we are able to ensure equitable resources across the RCH
for our bereaved families.
Introduction
Aim
Definition of terms
Management
Memory Making Equipment
Special Considerations
Companion Documents
References
Appendix 1 - Hand and Foot Embossing
Appendix 2 - Casting
Appendix 3 - Clay Moulds
Appendix 4 - Precious Touch for under 3 months old (Inkless Towelette)
Appendix 5 - Precious Touch for over 3 months old (Putty)
Evidence Table
Introduction
Nursing staff’s involvement in bereavement varies throughout the different areas in which they work. As healthcare professionals, we can assist in providing dignified and compassionate care to support families in creating lasting mementoes and memories. A standardised approach can enhance best practice and ensure families
receive consistent and comprehensive care.
Aim
- To create a standardised approach to memento and memory making, hospital wide
- To provide all families of children with life limiting conditions and bereaved families the opportunity to create memories/mementoes.
Definition
of terms
Bereavement: A broad term referring to the objective experience of family members and friends in the anticipation, death and consequent adjustment to living following the death of a loved one.
Mementoes: Mementoes are tangible symbols of the child’s life that help to evoke parents’ memories i.e., castings of foot and handprints, lock of hair, use of memory box and memory album, photography and jewellery.
Memory trolley: A trolley used to store all memory making equipment.
Management
Always discuss with family and document verbal consent prior to commencing the memento making process. Please document what tangible mementos are taken on the EMR ‘Death of a Child Checklist’ (found on the ‘resus tab’ of a patient profile. Please note that in a Coroner’s death
prior permission to take ink prints or locks of hair should be sought from the Coronial Office on 1300 309 519.
For some cultures and religions, it is not common practice to take part in particular memory making processes. Please speak with the family and consider consulting with
Pastoral and Spiritual Carestaff,
Interpreting Services or
Wadja Aboriginal Family Place as appropriate.
Memory
making equipment
Memory trolley
The hospital has three memory trolleys, located in the Ground Floor and Lower Ground Floor Bereavement Suites and Butterfly. In the circumstance where there is a death on the ward and staff would like support on completing the tangible mementoes, please call the Nursing Bed Manager who can arrange for nursing
support to be provided from Rosella or Butterfly. Wards should Lower Ground Floor Bereavement Suite trolley, for memento making. The ED AUM should be notified, and the trolley cleaned on return. Alternatively if this trolley is unavailable please access the Ground Floor Bereavement Suite trolley and notify the Rosella AUM or call Butterfly.
Please see the policy and procedure
herefor further information of accessing supplies if restocking is required.
Memory
box
A memory box is located in the memory trolley and bereavement rooms. The extra stock is kept in the locked cupboards with the bereavement supplies on the Ground Floor outside the Bereavement Suite, keys are located in Rosella, Butterfly, ED and PIPER.
These are assembled by folding the creases and using the adhesive pads, they do not need adhesive tape. Please ask for assistance if you are unsure of the assembling process. This can be filled with mementoes and whatever else the family wishes, including but not limited to:
- Memory album
- Hand and foot prints
- Lock of hair
- Embossing prints
- Child’s teddy or favourite soft toy
- Favourite story book
- Arm bands
- Bed cards
Memory album
Provide the family with a memory album that is located in the memory trolley and bereavement rooms. Extra stock is kept in the locked cupboards with the bereavement supplies on the Ground Floor outside the Bereavement Suite, keys are located in Rosella, Butterfly, ED and PIPER. Discuss with the family how they may like
to utilise the album. They may choose to fill with photographs, a lock of hair, hand and/or footprints, bed card, arm bands, or messages and memories. You may need to provide two albums for separated parents.
Lock of hair
Ask the parents if they would like a lock of their child’s hair to keep. This can be tied with ribbon and placed in a velum envelope located in the memory trolley. A lock of hair can be taken from underneath of the hair where it will not be missed (parents may advise
where to cut or do this themselves). It is easier to tie a ribbon around the hair prior to cutting.
Hand and foot prints – embossing and Ink
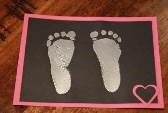
Hand and foot prints can be obtained utilising the embossing equipment located in the memory trolley. See
Appendix 1 for instructions. A similar technique, using the colour ink stamps, may be used to create ink prints, without the need for the heating gun.
Hand and foot prints – casting
Stone Casting is now available for all children, which is a two-part process using alginate and casting stone. See
Appendix 2 for instructions. Casting can be used for hands and feet although for best results only hands are recommended for children over two years. For this reason we will continue to stock a small amount of clay. Casts take 1-2 hours to dry.
Some pre-portioned stock will be available on the memory trolleys with the excess alginate and casting stone stock kept on the Ground Floor in a cupboard outside the Bereavement Suite (a key to this cupboard is available from the ED, Rosella and Butterfly AUM).
Hand and foot prints – clay
Casting is the preferable method for prints, however hand and foot prints can also be obtained using clay, which is located in the memory trolley. See
Appendix 3 for instructions. The amount of pressure that is required for optimal results can be distressing for families to watch, it is important that you discuss this with your family. We recommend offering families to be involved with the embossing print process and offer to do the clay prints whilst the
family get something to eat and drink.
Clay should be kept flat and can take up to one week to dry. Families should be encouraged to take prints home to avoid loss or damage in hospital environment. If this is not possible, please discuss with Social Work.
Impression jewellery
Precious Touch is an external commercial company specialising in creation of jewellery mementoes; a flier is available on the three Memory Trolleys. Alternatively, family may wish to look at the website:
www.precioustouch.com.au
The RCH Foundation is providing $250 per bereaved family towards a piece of precious touch jewellery through the RCH Bereavement Services at the Bedside Fund. The funding application (Provision of Service) form can be found
here. Staff can offer this service to families at any time.
Instructions on how to take the print used for the jewellery can be found below. Please note the inkless towelette (
Appendix 4) is best used for children under 3 months old and the putty (
Appendix 5) instructions for all other children.
A copy of the Provision of service form should be filled out for every patient, a copy emailed to Precious Touch and then original sent with the prints in a self-addressed envelope. A copy of the form and the Australian Post tracking number should also be added onto the child’s media tab in EMR by taking a clinical photograph. This equipment can be found on the three Memory Trolleys.
Photography
Photographs can be taken before, during and/or after death. Creating professional photographs of a child prior to or after death is an important aspect of bereavement care for many families. However, do not offer Photography services without first ensuring they are
available to come.
Photographs may be of the child and the child’s family. Photographs can be taken creatively to meet the needs of the family e.g. family portraits or child’s hand etc. Some families will decide that they do not want photos taken and their wishes should be respected. Below
are a list of photography services that can be offered.
Heartfelt have created a
tip sheet on taking photos and are happy to assist in
editing and processing of photos that are taken on the ward camera kits (also accessible from the Heartfelt.org.au website under Resources).
Four options are available:
1. Heartfelt photography
Heartfelt is dedicated to providing the gift of photographic memories to families in a caring, compassionate manner. All services are provided free of charge, which is provided by volunteer professional photographers. Fliers can be found on Memory Trolley. Staff may contact Heartfelt on 1800 583 768, day or night.
Heartfelt photographers attend the RCH only at the request of staff and must be accompanied by staff at all times whilst inpatient areas. Families will be provided with approximately twenty prints and a CD of all images for reprinting.
Website (www.heartfelt.org.au)
2. Clinical Photography via Creative Studio
Clinical Photography is provided by Creative Studio to infants who have spent most of their lives in hospital and who have not had family photographs or portraits taken outside of hospital. Creative Studio is available during business hours only – contact
x57087. After hours bereavement photography is not available. Creative Studio will consider exceptional requests by negotiation with the Social Work Department. Consent should be obtained using the RCH Consent to
Clinical Photography form.
3. Families own camera
Many families who have their own camera may wish to take photos; this should be supported.
4. Camera kit
Rosella and Butterfly have a camera kit, kindly donated by Heartfelt, for those families that do not have their own camera and do not wish to utilise the Heartfelt Photography professional photography service. These kits must be returned to the departments after use. As stated above, Heartfelt have created a
tip sheet on taking photos and are happy to assist in
editing and processing of photos that are taken on the ward camera kits (also accessible from the Heartfelt.org.au website under Resources).
Special
considerations
Cultural
requirements
Families may wish to participate in religious ceremonies with their child, such as a baptism or blessing. If a family wishes to have their own Religious leader present this can be facilitated. Please consult with Pastoral and Spiritual Care staff or Wadja Aboriginal
Family Place if further clarification is required.
Angel gowns, small gowns made from wedding dresses, are available from Rosella with the excess stock stored in the Ground Floor locked cupboards outside the Bereavement Room. These come in sizes XXS (Premature Baby) to XL (Approx 10kg) for both boys and girls. These gowns
are kindly donated, and commonly used for blessings. Families may choose to keep the gown afterwards or keep the child dressed in it.
Website (www.angelgownsaustralia.org.au).
Infection
control
There are no current guidelines on how long COVID-19 can last on surfaces, however a study undertaken by Pan et.al. (2020) notes the virus could not be detected on smooth surfaces after a period of 7 days. Memorabilia items therefore should be placed in a sealed plastic bag and family advised not to open for a period of no less than 7 days.
RCH staff should note the following when making memorabilia:
Embossed prints can be completed however strict guidance to infectious rules must be undertaken:
- Antistatic cloth is used outside the room only and not taken in
- Only the equipment used for the embossing should be taken into the room and the powder and gun should only be handled by a second 'clean' staff member away from the patient and bed (ie. A member not obtaining the foot/hand print).
- All equipment (plastic tray, heat gun, embossing powder container and versamark handle) must then be left wiped and left in the room for the nocospray
Precious touch finger prints can be taken if the following is followed:
- Only the putty/towelette required is taken into the room (excess stock left outside clean)
- Once the print is taken, the putty will be placed and sealed in a plastic bag by the bedside nurse. The 'clean' nurse then stands outside the room with a second zip lock bag which the prints are carefully placed into and closed with an sticker over the entry point.
- It can still be sent to Precious Touch immediately however must have a label 'COVID POSITIVE PATIENT’ on the outside of the bag with the date the prints were taken.
- All other equipment should be wiped and left in the room for the nocospray
Clay prints can also be taken with the clay rolled out outside the COVID-19 pod and put on hard cardboard with only the clay going into the room.
Casting stone prints may also be obtained – premeasured increments can be found on the memory trollies. Any extra equipment taken into the room must be wiped and left in the room for the nocospray Any excess stone or alginate must be discarded into an infectious yellow bag.
A lock of hair can be taken from the child and placed in a sealed zip lock bag.
Heartfelt photography is not routinely available for COVID-19 positive patients, however in extenuating circumstances and in direct consultation with Hospital Executive may be considered. Heartfelt will need to be notified the child is positive, and if a Heartfelt volunteer is available, who is double vaccinated, approval may be given. All equipment used by Heartfelt will need to remain in the room for nocospray
If parents wish to assist nursing staff in washing and preparing the child’s body for transportation, they will be required to wear PPE due to the risk of COVID-19 contamination or transmission.
Clean clothing can be left by the parent for the child to be placed into prior to transport to the morgue or funeral home. A highly infectious patient, such as a covid-19 positive child, is still only required to be placed in one body bag. Double body bags are no longer recommended by CDC unless excessive bodily fluids are expected.
The death of a child checklist should be completed in EMR noting the memorabilia that was created and which parent or family member took them from the RCH.
Companion
documents
References
-
Butler et al (2019), When a child dies in the PICU: Practice recommendations from a qualitative study of bereaved parents, Pediatric Critical Care, vol 20, nber 9, 447-451
- Meert, K.L., Thurston, C.S., and Briller, S.H. (2005) The spiritual needs of parents at the time of their child’s death in the Pediatric Intensive Care Unit and during bereavement: A qualitative study.Pediatric Critical Care Medicine, 6(4), 420-427.
- Thornton, R, Nicholson, P & Harms, L (2020), Creating evidence: findings from a grounded theory of memory-making in neonatal bereavement care in Australia, Journal of Pediatric Nursing, vol 52, pp29-35.
Appendix 1: Hand and foot
embossing
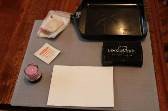
Equipment in the Memory Trolley, pre made cards in Memory Trolley.
Step 1: Assemble equipment
Step 2: Rub card with anti-static cloth
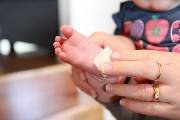
Step 3: Clean foot/hand with alcohol wipe
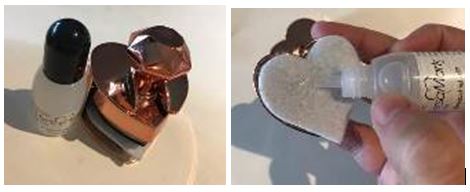
Step 4: Place a single-use pad onto the applicator tool (heart shaped with handle) and drop the clear Versamark gel onto the pad until it is covered.
Step 5: Stamp gel over inner hand or foot with gelled pad
Step 6: Put hand/foot onto card and press down all fingers/toes
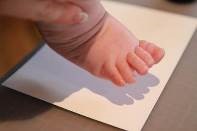
Step 7: Sprinkle with embossing powder

Step 8: Shake off excess into tray and put back into pot
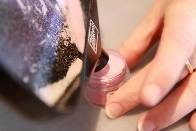
Step 9: Set with heat gun at least 20cm away from card until powder has melted
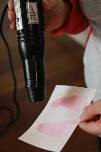
Step 10: Clean all equipment
Please use Alcohol wipes to wash out tray, put lids tightly on powder and return all equipment back to memory trolley. If we all keep it neat and tidy it will make it easy to use when needed.
Appendix 2: Casting
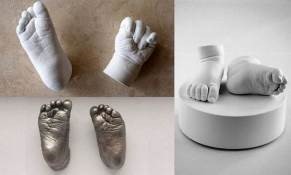
Hand and foot casts
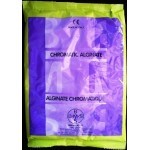
Mould: Alginate
Casting stone
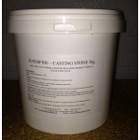
Casting is ideal for baby’s hands and feet. Foot casts are not recommended in children over 24 months as this can look destressing. We recommend hands or family hand casts in these situations for older children.
For the mould: Please NOTE the process of mixing to setting time is only about 1 minute. Therefore, you need to mix the Alginate at the bedside for one limb at a time.
Alginate Mould Ratios.
| Size |
Alginate |
Water |
| Small (up to 5kg) |
100 Grams powder |
250 mls/grams Water |
| Medium (5 to 20kg) |
150 Grams Powder |
375 ml/grams water |
| Large (For hands) |
200 Grams powder |
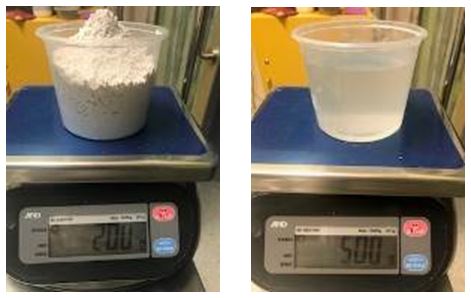
500 mls /grams Water |
- Ensure the patients hand or foot can fit in the container, deep enough to submerge the whole hand or foot without touching the bottom or sides of the container.
- Measure the Alginate powder into the plastic container and measure the water in a separate container according to the above chart.
Volume for large hand see above table for other sizes.
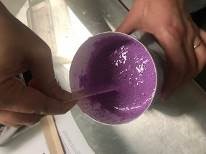
- Add measured water to powder and mix with a tongue depressor until combined (it will turn purple). Note: you only have about 45 seconds to do this before the mixture begins to start setting and change colour. Mix slowly until powder begins to combine, then much more rapidly to ensure a fairly
smooth mixture.
- Once mixed, place the hand/foot into the mixture immediately by initially dipping in and out then fully submerging the limb ensuring that it does not touch the sides or bottom. Hold it there until it slowly sets over 1-2 mins. The alginate will change from purple to pink as it starts to set,
then white when it is fully set. Check that it has hardened by gently prodding the top. It should be firm and bouncy but not wet.
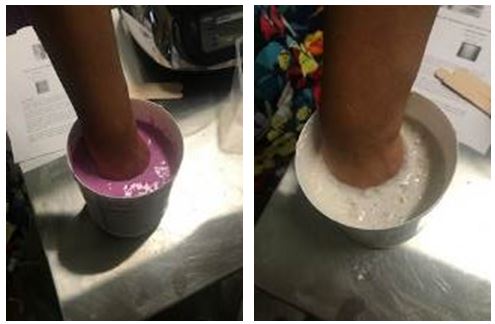
- Once it has set, gently break the seal all the way around the base of the limb. Wriggle the limb and gently pull out. Rinse the inside of the mould out with water (ensure all water is drained out). The Mould is now complete. Repeat process each time for each limb.
Once all moulds are complete, they are ready to be filled with the casting stone. This can be done away from the patient.
For casting stone

| Size |
Casting Stone |
Water |
| Small (small hands) |
100 grams casting stone powder |
80 mls / grams water |
| Medium (hands & feet or one bigger hand) |
200 grams Casting stone powder |
160 mls / grams water |
| Large (two big hands) |
300 grams Casting stone powder |
240 mls /grams water |
Note: Be careful not to get this on your skin as it may cause irritation, wearing gloves is recommended. It is advised to also wear a surgical mask to avoid accidental inhalation of powder.
- Measure Casting Stone and water according to above chart. Pour water into casting stone and mix until well combined, this should be a smooth mixture with no lumps.
- Once combined, pour a small amount of the mixture into the mould (about ¼ full) and swirl it around getting it into all the fingers and toes. Then slowly fill the rest of the mould to the top (or as far up the wrist, arm, ankle or leg as desired, tapping mould on a hard surface as you fill to ensure
air bubbles are released.
- Once full, moulds can be set aside to dry. This takes about 1-2 hours however, moulds can be gently opened after 45 mins if urgent.
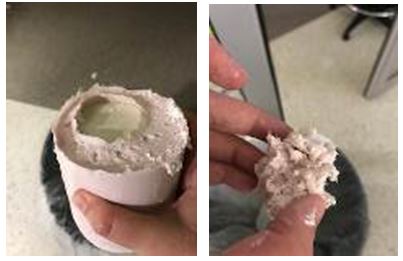
- Please DO NOT pour left over
casting liquid down any drains.
After the casts have set, the moulds can be removed from the containers. Gently break away the mould piece by piece to reveal the cast. Take extra care around fingers and toes as these can be delicate. Use some string or cotton tip stick to remove the small pieces of
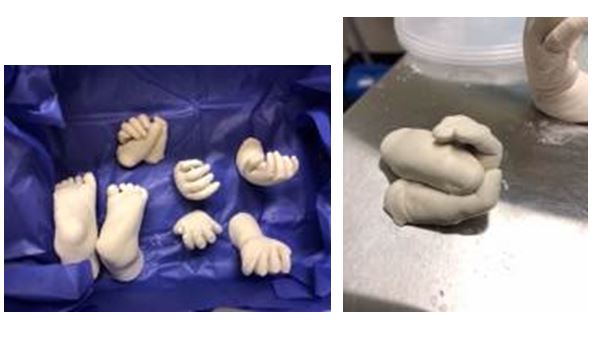
alginate between fingers, toes and creases. The casts are then ready to go home with families however, will continue to dry out over the next few days. Wrap the completed castings in bubble wrap and place in a box with tissue paper.
Examples
Appendix 3: Clay moulds
Step 1: Assemble equipment
Clay, Wooden board, cling wrap, knife, circle template to cut clay to desired size, clean hands/feet
Step 2: Cover wooden board with cling wrap
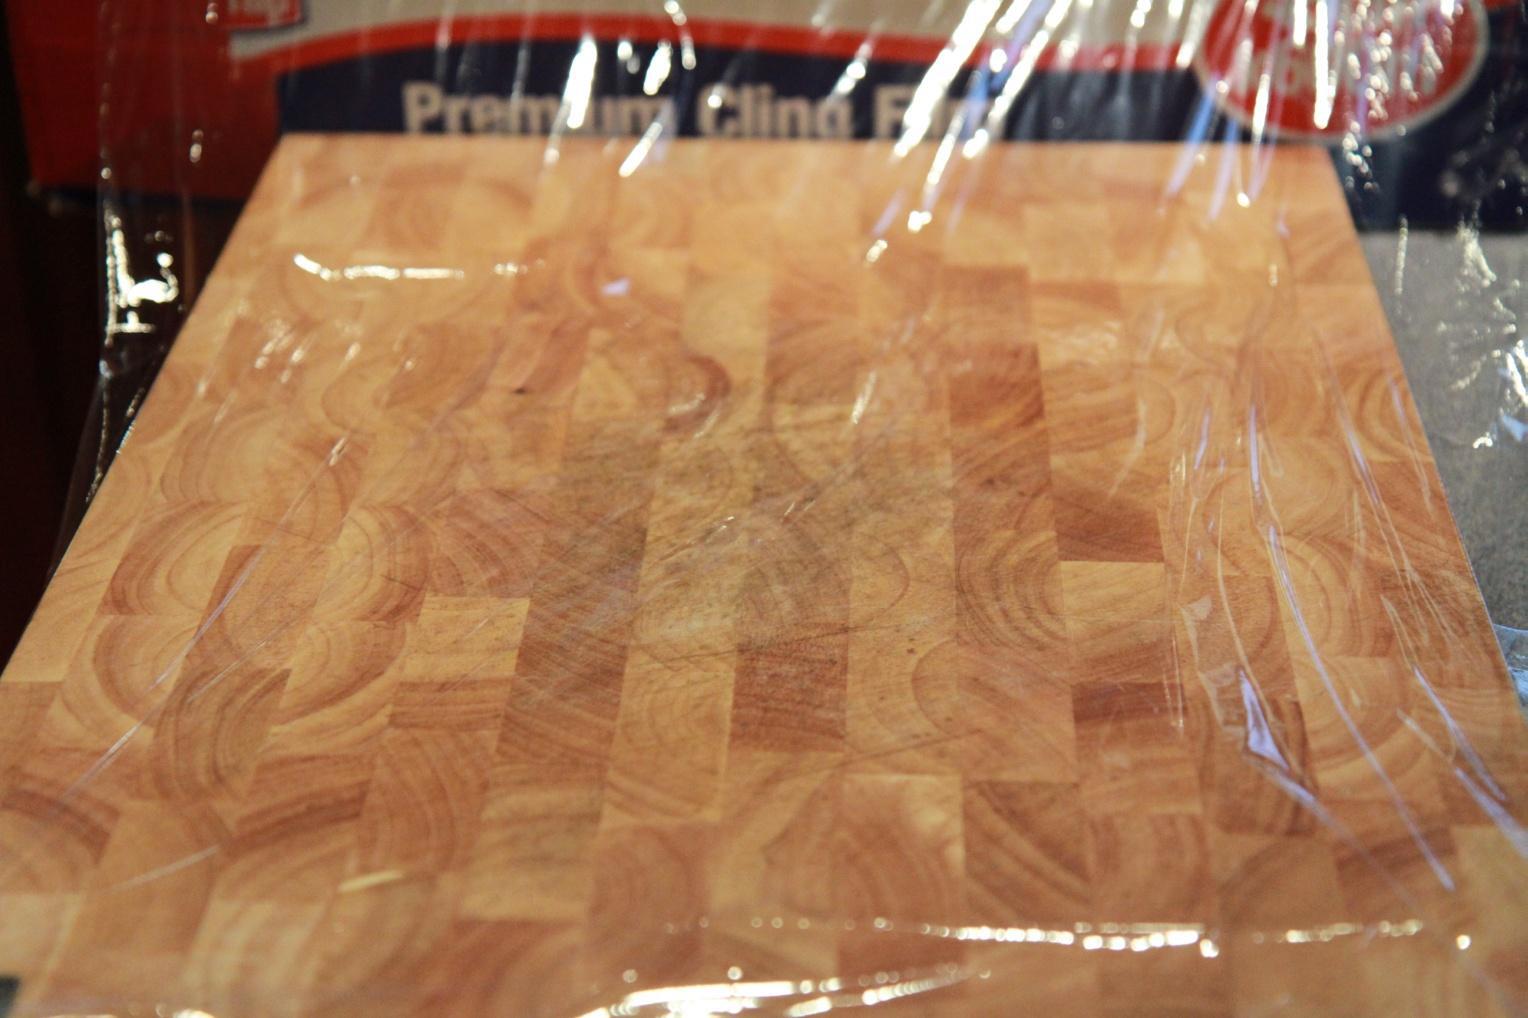
Step 3: Open clay and kneed to soften
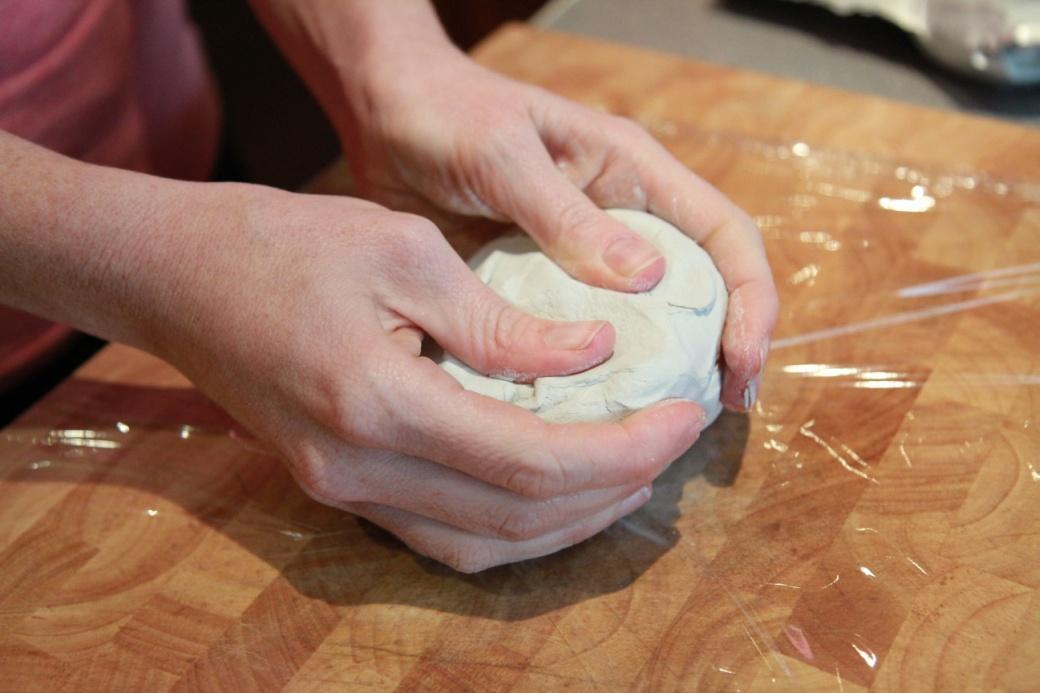
Step 4: Roll out clay evenly using rolling pin to a thickness of approximately 0.5cm no thinner
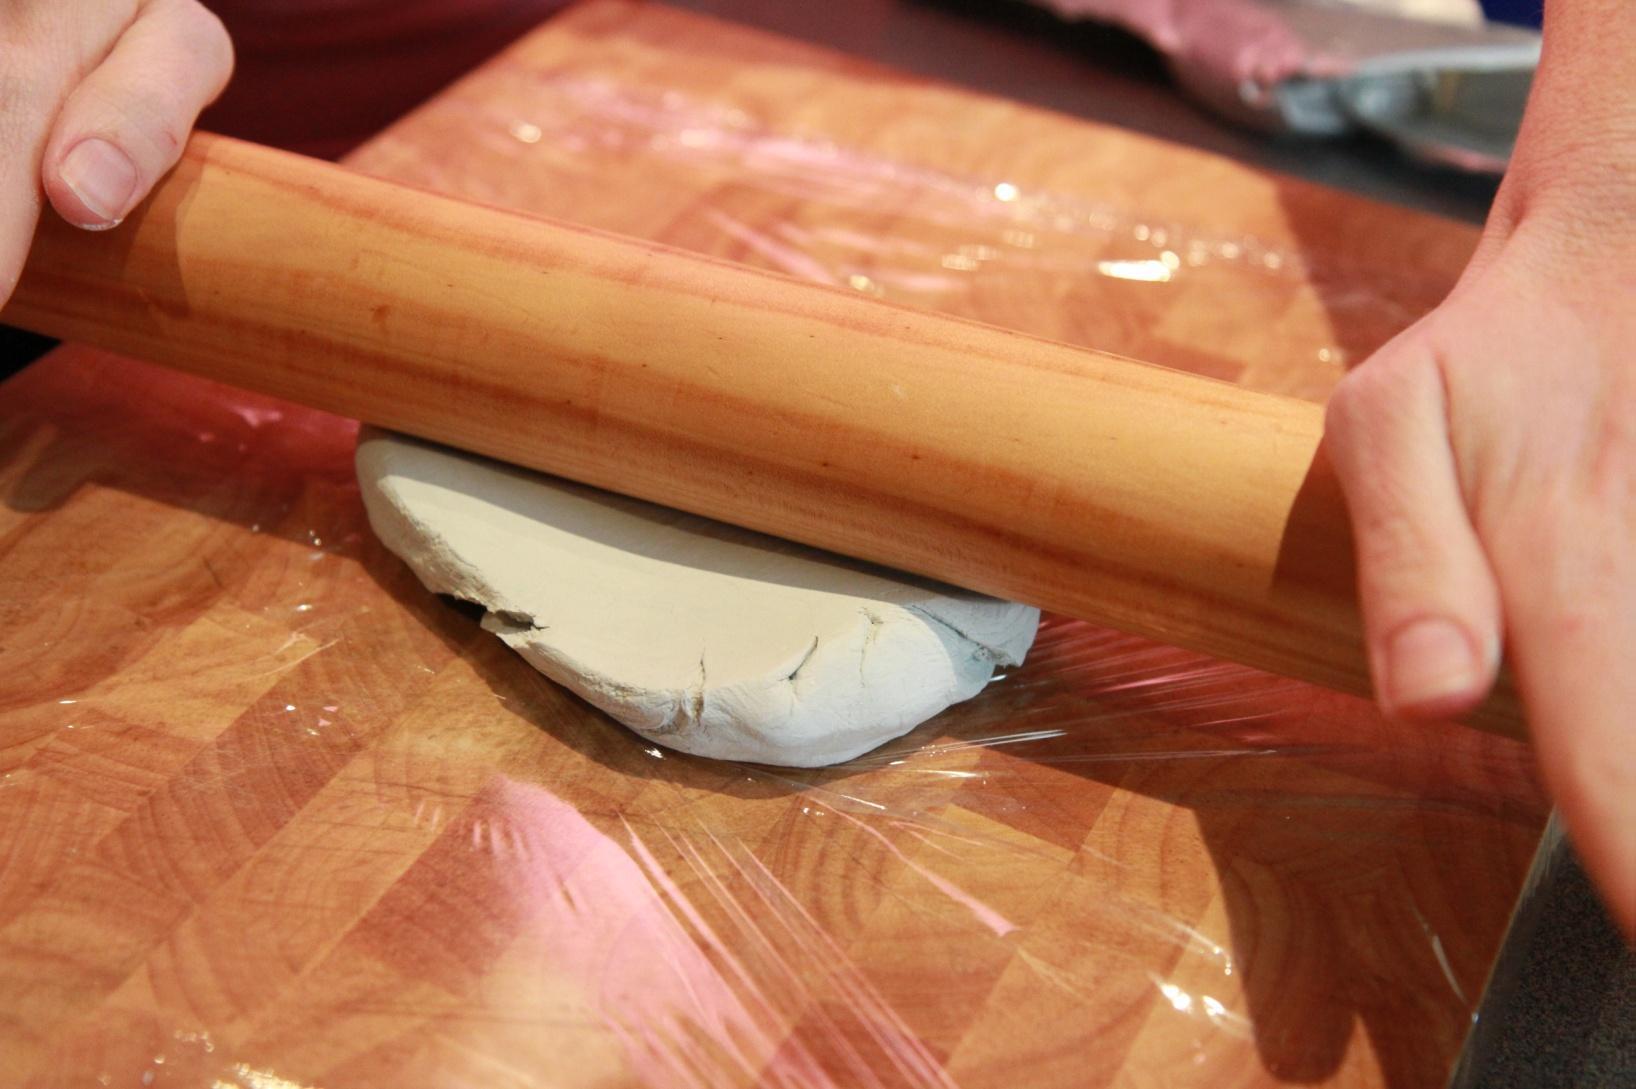
Step 5: Ensure clay is smooth and has no bubbles
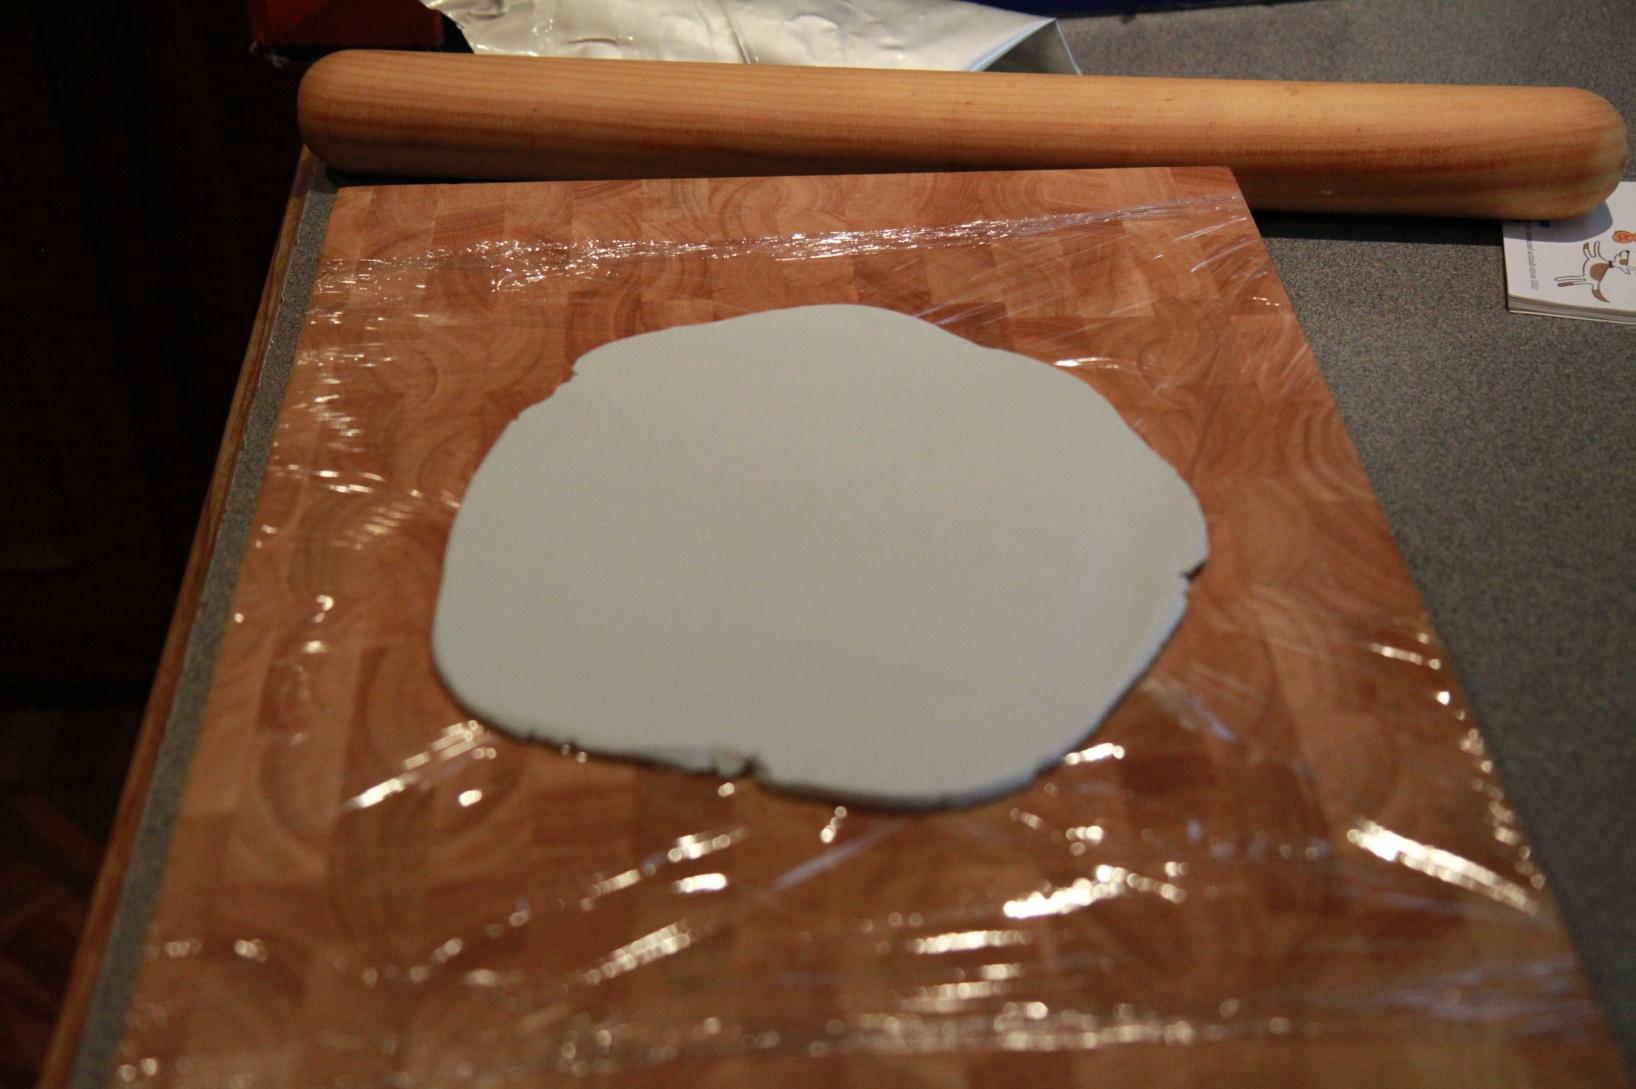
Step 6: Use plate or circle template to cut out circle
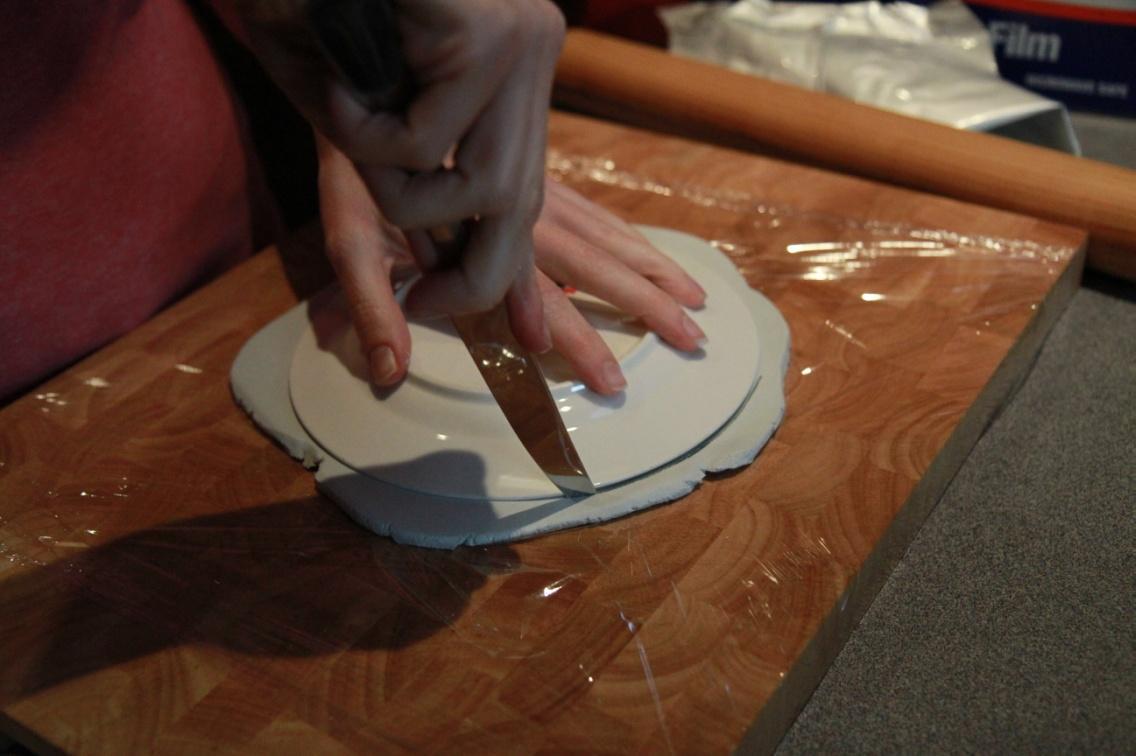
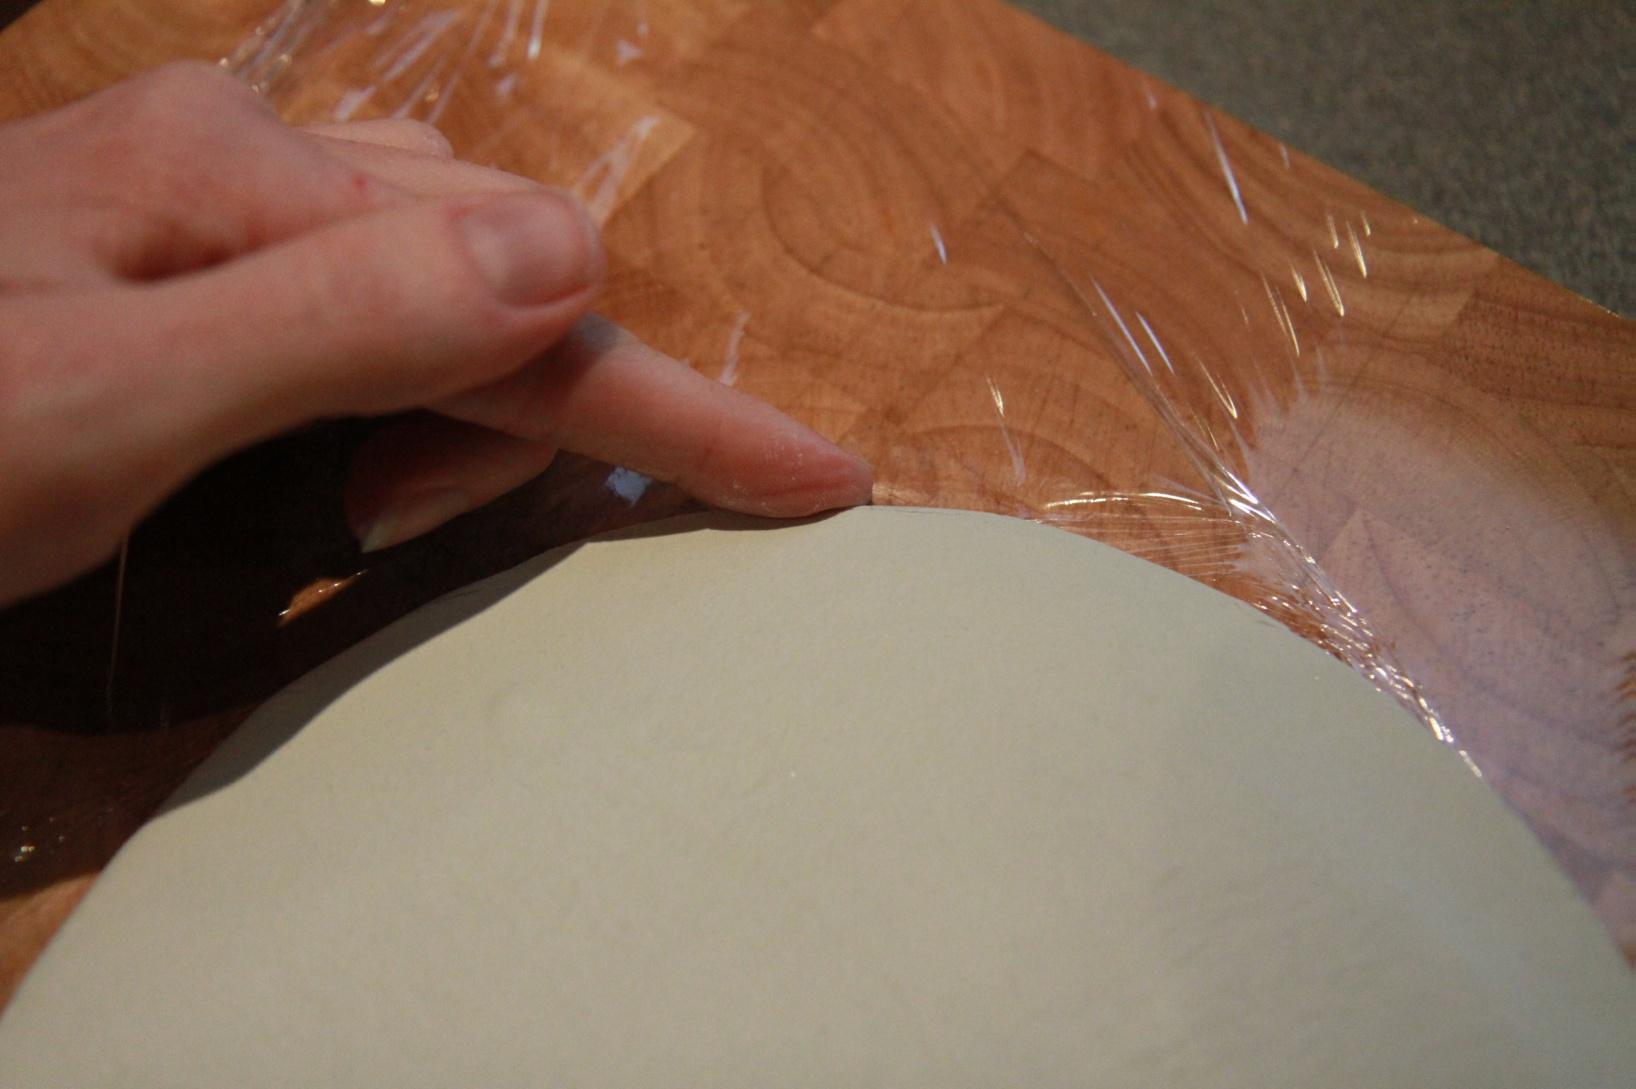
Step 7: Smooth cut edges with finger
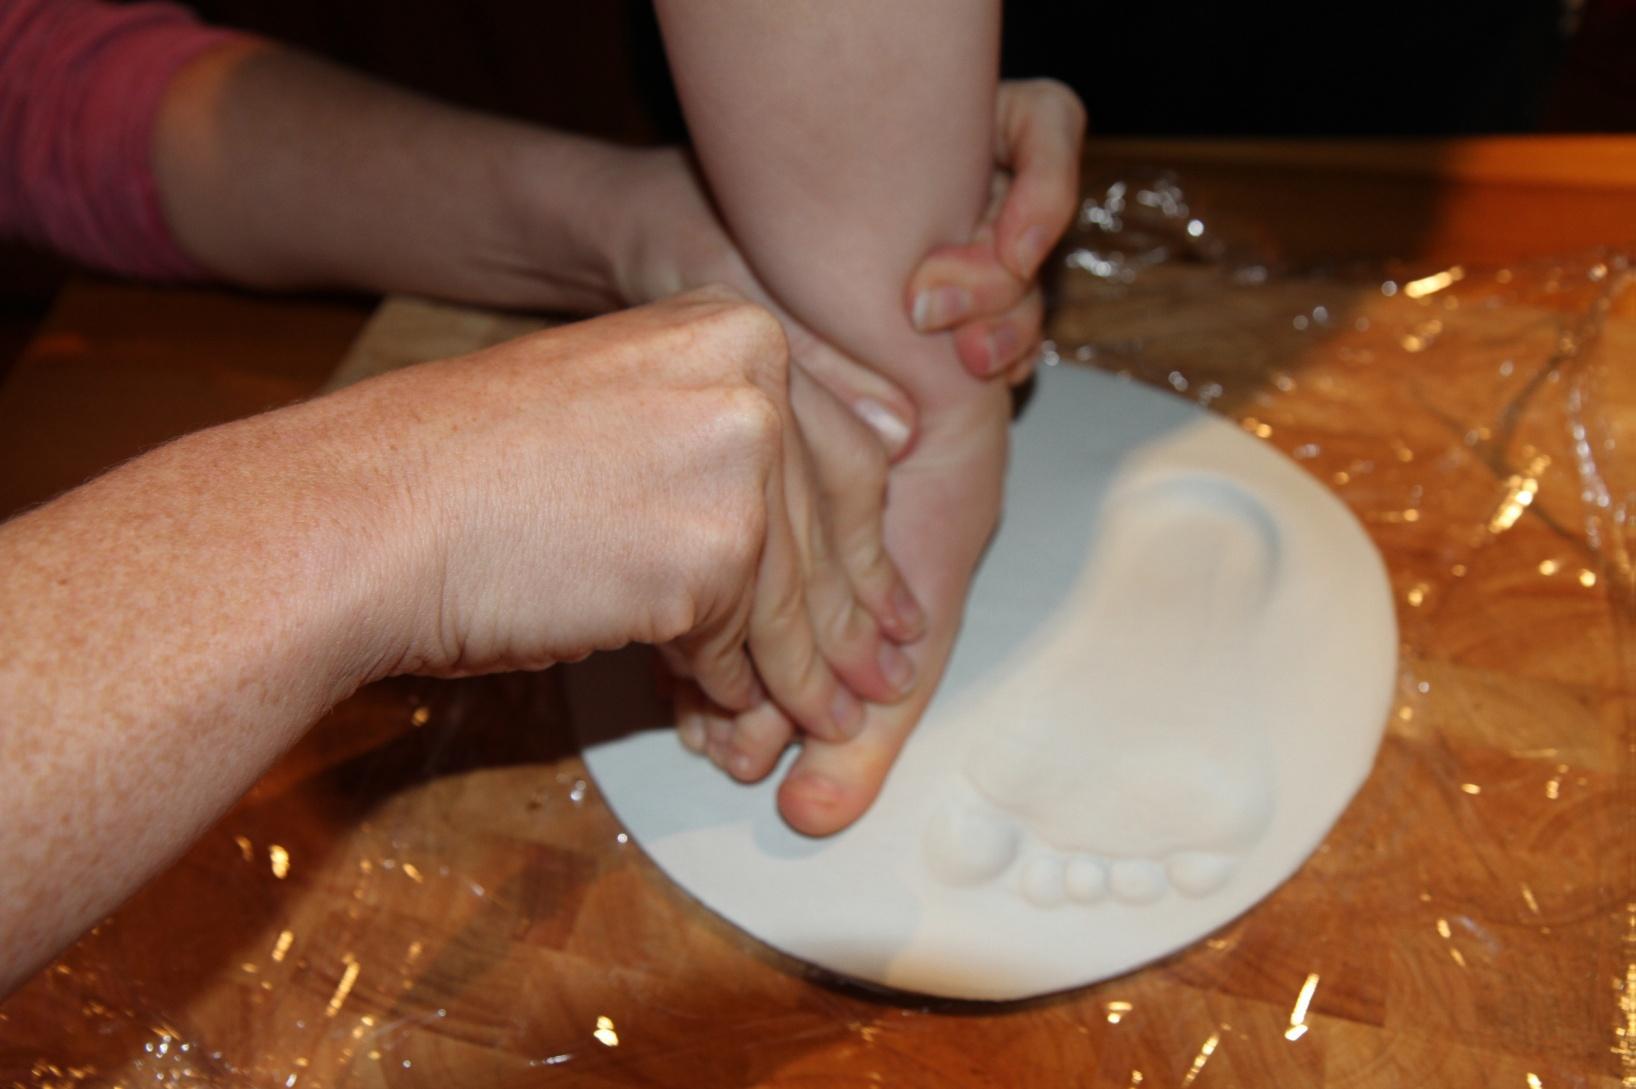
Step 8: Press foot or hand down into clay need to press firmly. May need two people
Step 9: Lift clay board using cling wrap and place onto firm surface (ie. Cardboard). Takes approximately 1 week for clay to dry fully and turn white. Pack carefully for families to transport home.
Appendix 4: Precious Touch for under 3 months old (Inkless Towelette)
INSTRUCTIONS FOR OBTAINING A FOOT OR HAND PRINT USING THE DACTEK INK
LESS TOWELETTE
PLEASE READ CAREFULLY BEFORE PROCEEDING
The Dactek disposable inkless towelette has been supplied to us from Precious touch Jewellery and is another way to provide a very detailed print of a child’s hand and feet. This can then be scanned and used by Gail to create jewellery and also given to the family as a keepsake.
This should be used on children less than 3 months as it is difficult to obtain a good fingerprint cast.
Important – paper is best to be placed on a flat hard surface such as a clip board or hard book when taking prints. Only one side of the paper is coated in the special formula to enable you to take prints. The best way to determine which side is the usable side, please open the
wipe, smear a little on your own forefinger and thumb and pinch the corner of the paper to see which side shows the darkest print. The darkest side is the usable side.
- Ensure that the subjects hand/foot is clean.
- Unfold the wipe completely after it is opened, and then re-fold it into half. Ensure the skin is wiped very well with the inkless wipe provided. The wipe will appear slightly dry (this is normal) – give the wipe a very good coverage over the skin.
- Apply the foot or hand directly on to the paper and press and hold for a second or two.
- The print will appear slowly in a few seconds
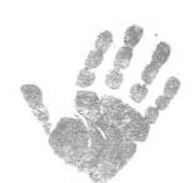
- The print will be fully developed within a couple of minutes. Please see handprint example below as a reference of a successful print.
Tips
- One wipe can be used for numerous prints. This means that for one child you will only need to open one wipe.
- It may feel like there is not enough on the hand/foot as it feels quiet dry, this is normal but not much is needed to leave a print
- The paper and wipes are quiet expensive. Gail has provided this to us free of charge as part of her service, please use only as much as you need.
- Please don’t worry too much about smudging as this can be edited out in order to make the jewellery – just try to ensure that all fingers and toes are visible.
Appendix 5: Precious
Touch for over 3 months old (putty)
INSTRUCTIONS FOR OBTAINING A FINGERPRINT CAST
If the child is less than 3 months please use the Dactek inkless towelette as it is difficult to obtain a fingerprint cast.
Obtaining a fingerprint cast is a straightforward process. However, please note that the putty supplied is only pliable when hot – please take all necessary precautions to ensure that you do not injure yourself when handling the heated putty. Please read these instructions all the way
through before starting the process. Please also note, that the putty can be
reheated as many times as necessary to obtain a satisfactory print so it is not
a problem if you are unhappy with the first attempt.
1. Immerse the putty in a cup of just boiled water for 1 minute
2. Extract the putty from the just boiled water using a spoon or tongs to ensure that you do not burn yourself on the hot putty.
3. Pat the putty dry with a clean tea towel and it should then be cool enough to handle.
4. While the putty is still very warm, and using a book or hard surface on which to press down, press the finger firmly into the putty and hold for 30 seconds (or until the finger comes away easily from the putty which may take up to a minute and a half in warm, muggy
conditions).
5. Carefully remove finger from the putty and set the putty aside on the hard surface to cool and harden. It is important to leave the putty on the hard surface you have chosen as, if you try to remove it while the putty is still soft, a crease will form through the
print.
6. If you are not happy with the print you have obtained, you can re-do the print by re-submerging the putty in boiling water for a further minute removing as before, drying and rolling into a smooth ball between the palms of your hands.
Please note that the quality of the piece of jewellery is dependent on the quality of the print obtained - if you do not see a clear impression of the fingerprint in the putty when it has cooled, the putty can be immersed in hot water again and the process repeated. For a successful cast, you are looking for a nice deep fingerprint impression, almost to the bottom of the putty and you should be able to see visible print lines and swirls when you hold the mold up to the light. If you cannot see these, please repeat the
process to avoid disappointment with the finished product.
Please return the cast in the envelope supplied together with the completed information sheet to Gail Johnson, Precious Touch Jewellery, 14 The Close, Beaumaris, Vic,
3193.
Any questions, please do not hesitate to call Gail Johnson on 0414 604 622.
Evidence table
The
evidence table for this guideline can be viewed here.
Please remember to
read the disclaimer
The development of this nursing guideline was coordinated by Jess Rowe, ED, RN, and approved by the Nursing Clinical Effectiveness Committee. First published April 2021.